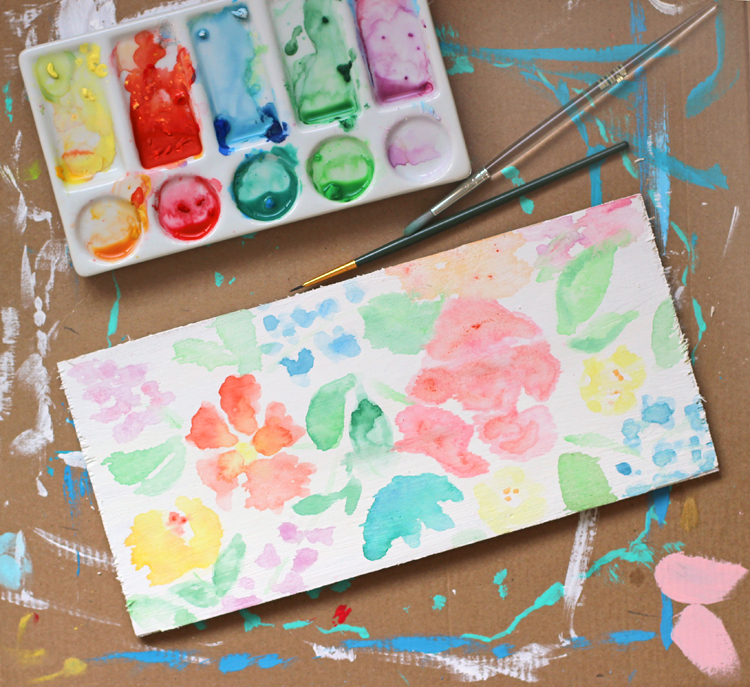
Easter is coming right up, but it’s not too late to make some cute DIY Easter decorations. I’ve been wanting to try watercoloring on wood for a while now, so I decided now was the time and I made a watercolor floral wooden sign. It turned out so cute that I just had to create a tutorial for you. And I’m sharing a free cut file for the word “Easter” too. I love this loopy lettering. It’s so happy and spring-ish!
I’m not a trained watercolor artist AT ALL, so if I can do it, you can too. Here’s the secret… Google “watercolor florals” and look through images until you find one that inspires you. Then look at it while you paint!
started by painting my scrap piece of wood with white chalk paint. You could also watercolor on raw wood. I think either way is pretty.
While my watercolor masterpiece (ahem…don’t laugh) was drying, I headed to my computer to design a cut file in Silhouette Studio.
Once you download the file, open it in Silhouette Studio.

Adjust the cut settings to vinyl. Stick a piece of vinyl onto your cutting mat and cut out your word.
I used glitter adhesive vinyl from Expressions Vinyl in the coral color. You can find it HERE. It’s so pretty and adds a great sparkle to my sign.
Here’s my fail-proof method for applying adhesive vinyl to a project.
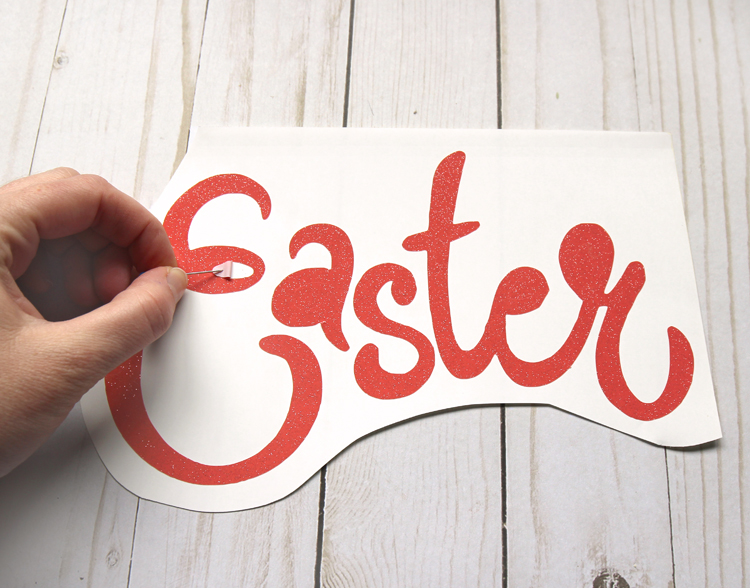
Step 1. Weed the excess vinyl away. Peel it off, leaving only the part of the project you want to use.
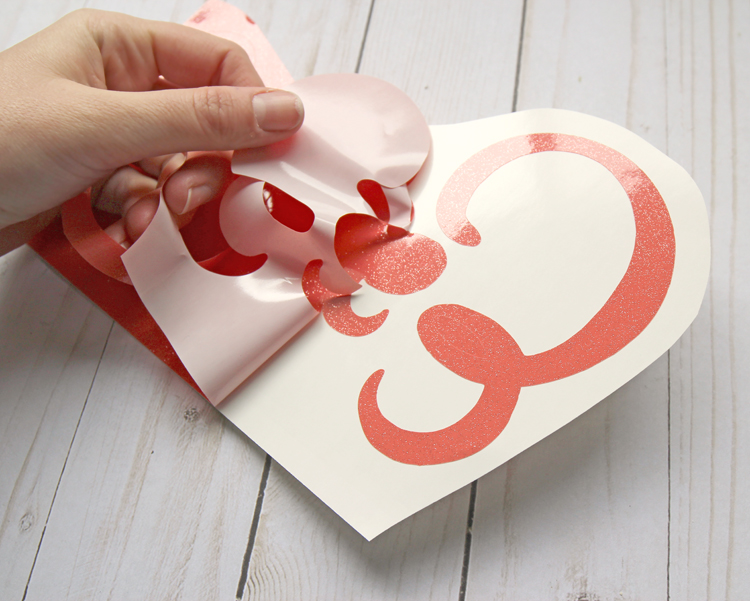
Don’t forget the little parts that need to be removed. I use a straight pin to help me peel away the small pieces.
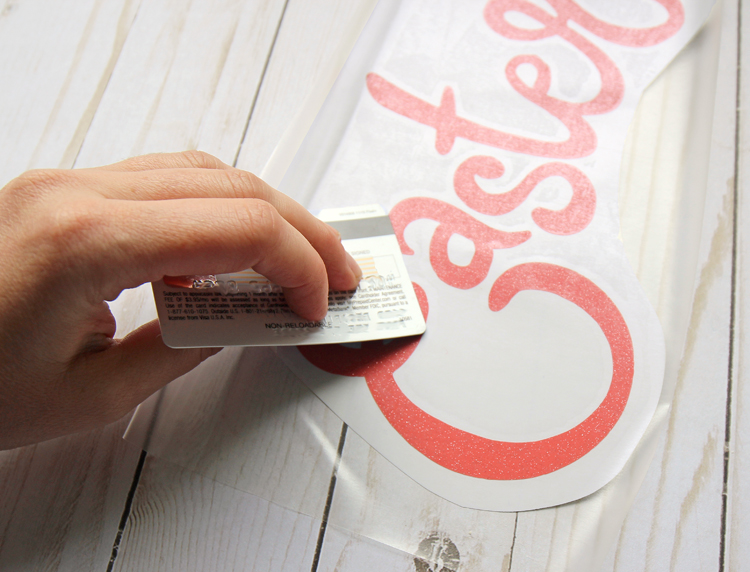
Step 2. Cover the design with a piece of transfer tape or clear contact paper. This helps you transfer the image without messing up the spacing.

I use an old gift card to firmly press the tape to the vinyl.
Step 3. Peel the design away from the white backing paper.
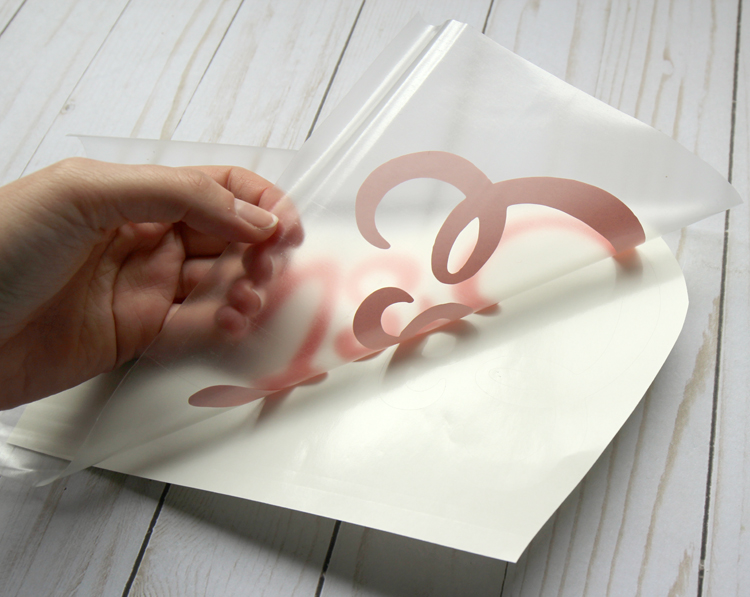
Step 4. Center your design onto the sign. Gently set it down, double check that it’s straight, then press it into place. I use my handy old gift card again for this step.
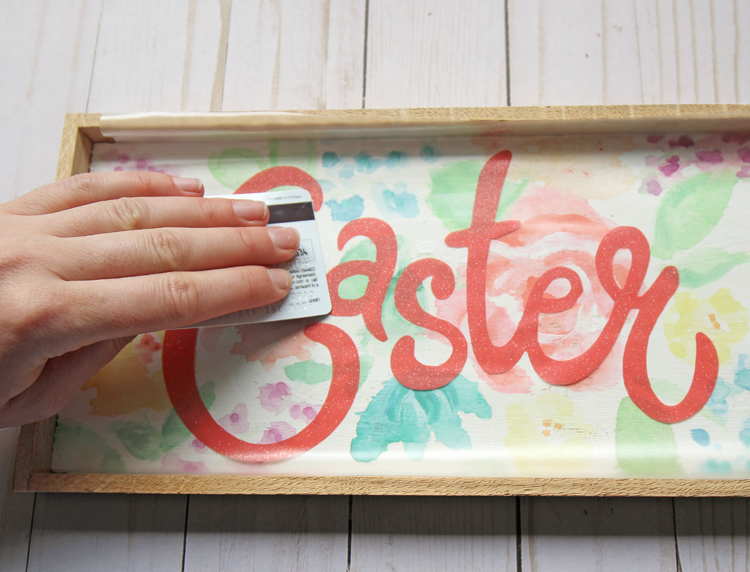
Step 5. Peel away the transfer tape/contact paper and your sign is finished!
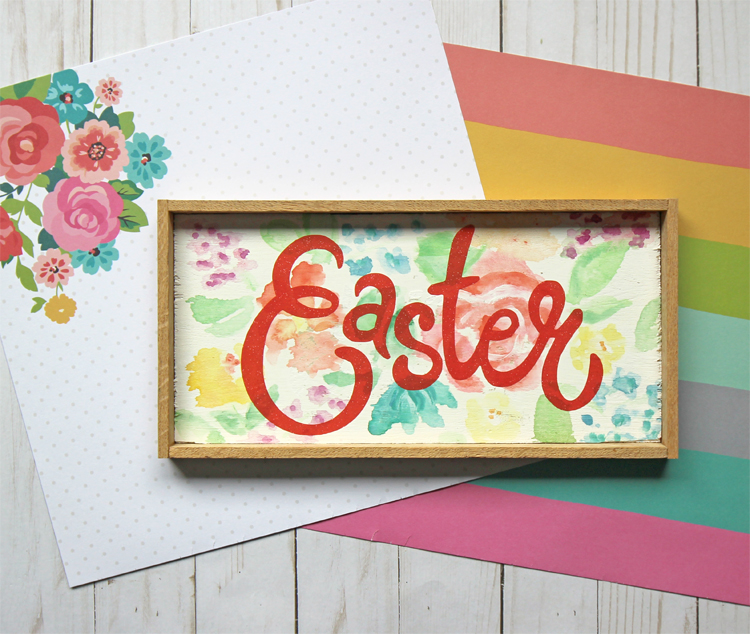

See?! I told ya. It totally matches. Anyway, that’s how you make a sign with vinyl. So what do you think… will you give it a try?